Materials
* crochet hook 3.5mm
* worsted weight yarn (I chose GREEN as the main color and CREAM for contrast)
* one button about 1 inch/2.54 cm in diameter
* yarn needle
Abbreviations
* Ch - chain* Sc - single crochet
* Sc2tog - single crochet next two chains together
Instructions
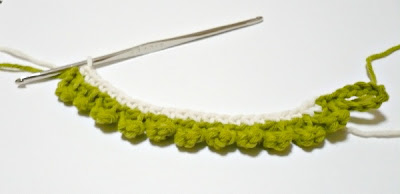
1) With green yarn and 3.5mm crochet hook, (ch5, sc2tog twice), forming the first petal. Repeat ( ) for as long as
is required for the length of the bracelet. My bracelet measures 5.5 inches/13.97 cm long, consisting of 11petals. Remember to make this bracelet just fitting your wrist at this point since we are going to add a button loop which will increase the length of the bracelet slightly.
2) Continue to
ch10. Bring the chain back to the
starting ch and slip stitch into the first starting ch, forming the button loop.
3) Join cream yarn. DO NOT
cut off the Green yarn yet. Sc along the edge of the green crocheted piece evenly,
right to the end. Cut off the cream yarn and weave in all ends.
4) Go back to
the green yarn still attached. Now
start to slip stitch in each cream yarn sc, right to the end. Cut off the green yarn, leaving a tail of
about 8 inches. Thread this tail yarn
onto a yarn needle and attach a button onto the piece.
Weave in all
ends.
Finished Bracelet :)
Wear your handcrafted Flirty Petal Bracelet with Pride! :)
Please
do not redistribute/sell this pattern or post it anywhere online. You
may link to this blog post if interested :) Thank you!


The way you have explained the tutorial of this bracelet is very impressive.
ReplyDeleteThank you very much, Ettika, for your kind words! Your comment made me very happy :)
DeleteDear Amy Lin, Another nice pattern; thank you for sharing!
ReplyDeleteI wanted to let you know that I made 3 of your nice mice and put a link on my blog.
If you like you can take a look!
See you, have a nice day,
Mirjam.
Love love love those mousies that you crafted! So colorful and so well-made! Mirjam, thank you so much for letting me know :) Your blog is so beautiful and so is your kitty :)
DeleteDear Amy Lin, thanks a lot for your nice response!
Delete