* Worsted weight acrylic yarn
* 4mm crochet hook
* 0.875 inch button
* Swivel clasp with split ring
* stitch markers (I used scrap pieces of yarn)
Abbreviations:
ch chain
sc single crochet
rnd round
blo back loop only
flo front loop only
Size of finished purse: 2 x 2 inches/5.08 cm square
Instructions:
Rnd 1: Chain 11. Work 10 sc across, placing a stitch marker on the first sc. Continue to work 10 sc on the other side of the ch. Total = 20 sc.
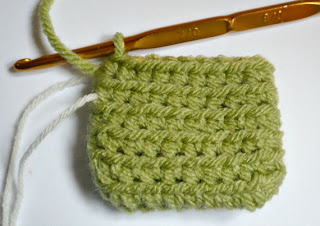
Rnd 2 to 6: Sc on blo. Each rnd will have 20 sc. (please see below pic)
Purse with the first 6 rnds of crochet.
Rnd 7: Work first 2 sc on blo, work next 3 sc on blo and attaching the split ring simultaneously, then sc on blo for the remaining stitches. Total 20 sc. (please see below pic)
Key ring attached on rnd 7.
Next, we are going to crochet the cover flap. From here onwards, the piece is worked in rows.
Row 1: Work 10 sc on blo. Ch 1 and turn the piece.
Row 2: Skip first sc. Sc next 8 sc on flo. Place a stitch marker here to mark this row for easy identification later. Ch 1 and turn.
Row 3: Work 8 sc on blo. Ch 1 and turn.
Row 4: Work 8 sc on flo. Ch 1 and turn.
Row 5: Work 2 sc on blo, ch 3, skip next 4 sc, sc on blo of last 2 sc. Total 7 stitches. Ch 1 and turn. (The buttonhole is created).
Row 6: Work 2 sc on flo, work 3 sc into the buttonhole loop, work last 2 sc on flo. Ch 1 and turn. (please see below pic)
Cover flap completed.
Next, we are going to create the border stitches on the cover flap -
Work 7 sc on the top long edge. For the first short edge, work 5 sc spacing them out evenly. For the bottom long edge, work 8 sc on the remaining blo of the previous row 2 marked with stitch marker. For the second short edge, work 5 sc spacing them out evenly. Slip stitch to next stitch to end. Fasten off yarn and weave in ends. (please see below pics)
Working the border stitches on the cover flap of purse.
Completed purse before attaching button.
Lastly, attach the button to the centre of the purse. Please see below pics for the completed item.
Front
Back
Lying flat
I hope you have enjoyed this free pattern :) Do not hesitate to contact me should you have any questions.


No comments:
Post a Comment